How to Clean Up Disk Space on Mac Without Losing Files
When a Mac is almost full, the safest goal is not the largest possible number of free gigabytes. It is enough working headroom for saving files, installing updates, and creating temporary data, with the least recovery risk. Back up the only copy, measure the disk, remove the largest confirmed replaceable items, and verify the Mac before emptying Trash.
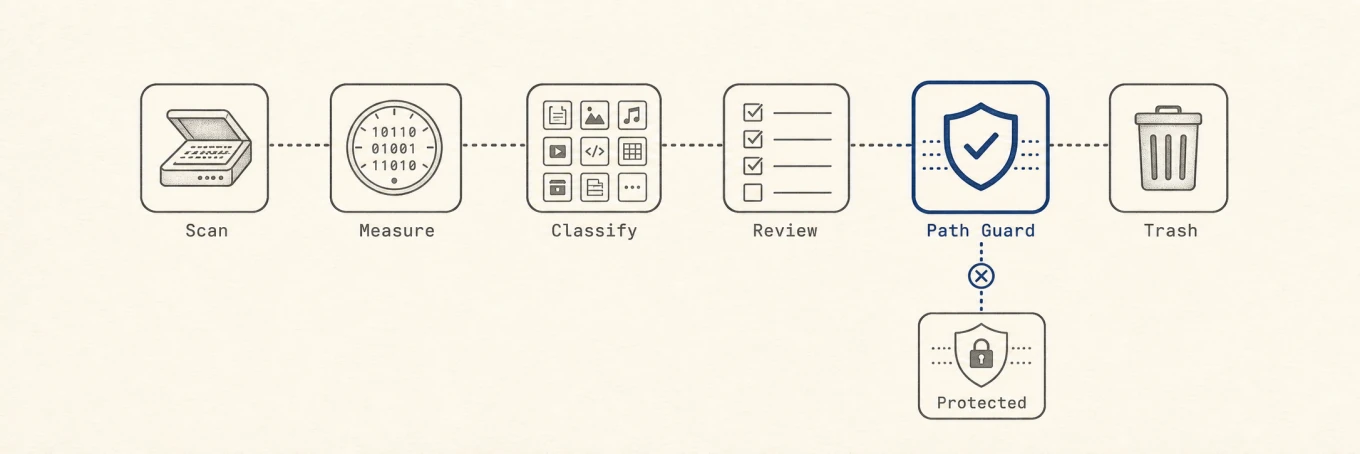
Step 0: Protect the only copy
Before a large cleanup, confirm that Time Machine or another backup has completed and that important files are included. Open a few files from the backup or perform a small restore test. A backup that has never been read is still an assumption.
Cloud synchronization is useful, but it is not the same recovery contract. Deleting a synchronized file may delete it on every signed-in device. Check whether Photos, Desktop, Documents, or another library keeps full local originals before you remove anything from the Mac.
If the disk is too full to save or update
Create a small amount of emergency headroom with one clearly replaceable item:
- A downloaded
.dmgor installer you can fetch again - A copied video export whose source and delivered copy both exist
- An old archive already stored somewhere else
- One large item already in Trash, after verifying it is safe to erase
Do not begin with Library databases, snapshots, swap, or a system folder. The first few gigabytes should make measurement and a backup possible, not create a second emergency. Apple also notes that Safe Mode clears certain system caches temporarily, which can create enough room to finish an update, but those caches are rebuilt later.
Step 1: Measure before choosing a target
Start with Apple menu > System Settings > General > Storage. Click the Info button beside categories that offer it. Apple's Storage guide points to Applications, Documents, Messages, media, Trash, and other user-controlled categories. A broad block such as System Data is a classification, not a folder to delete.
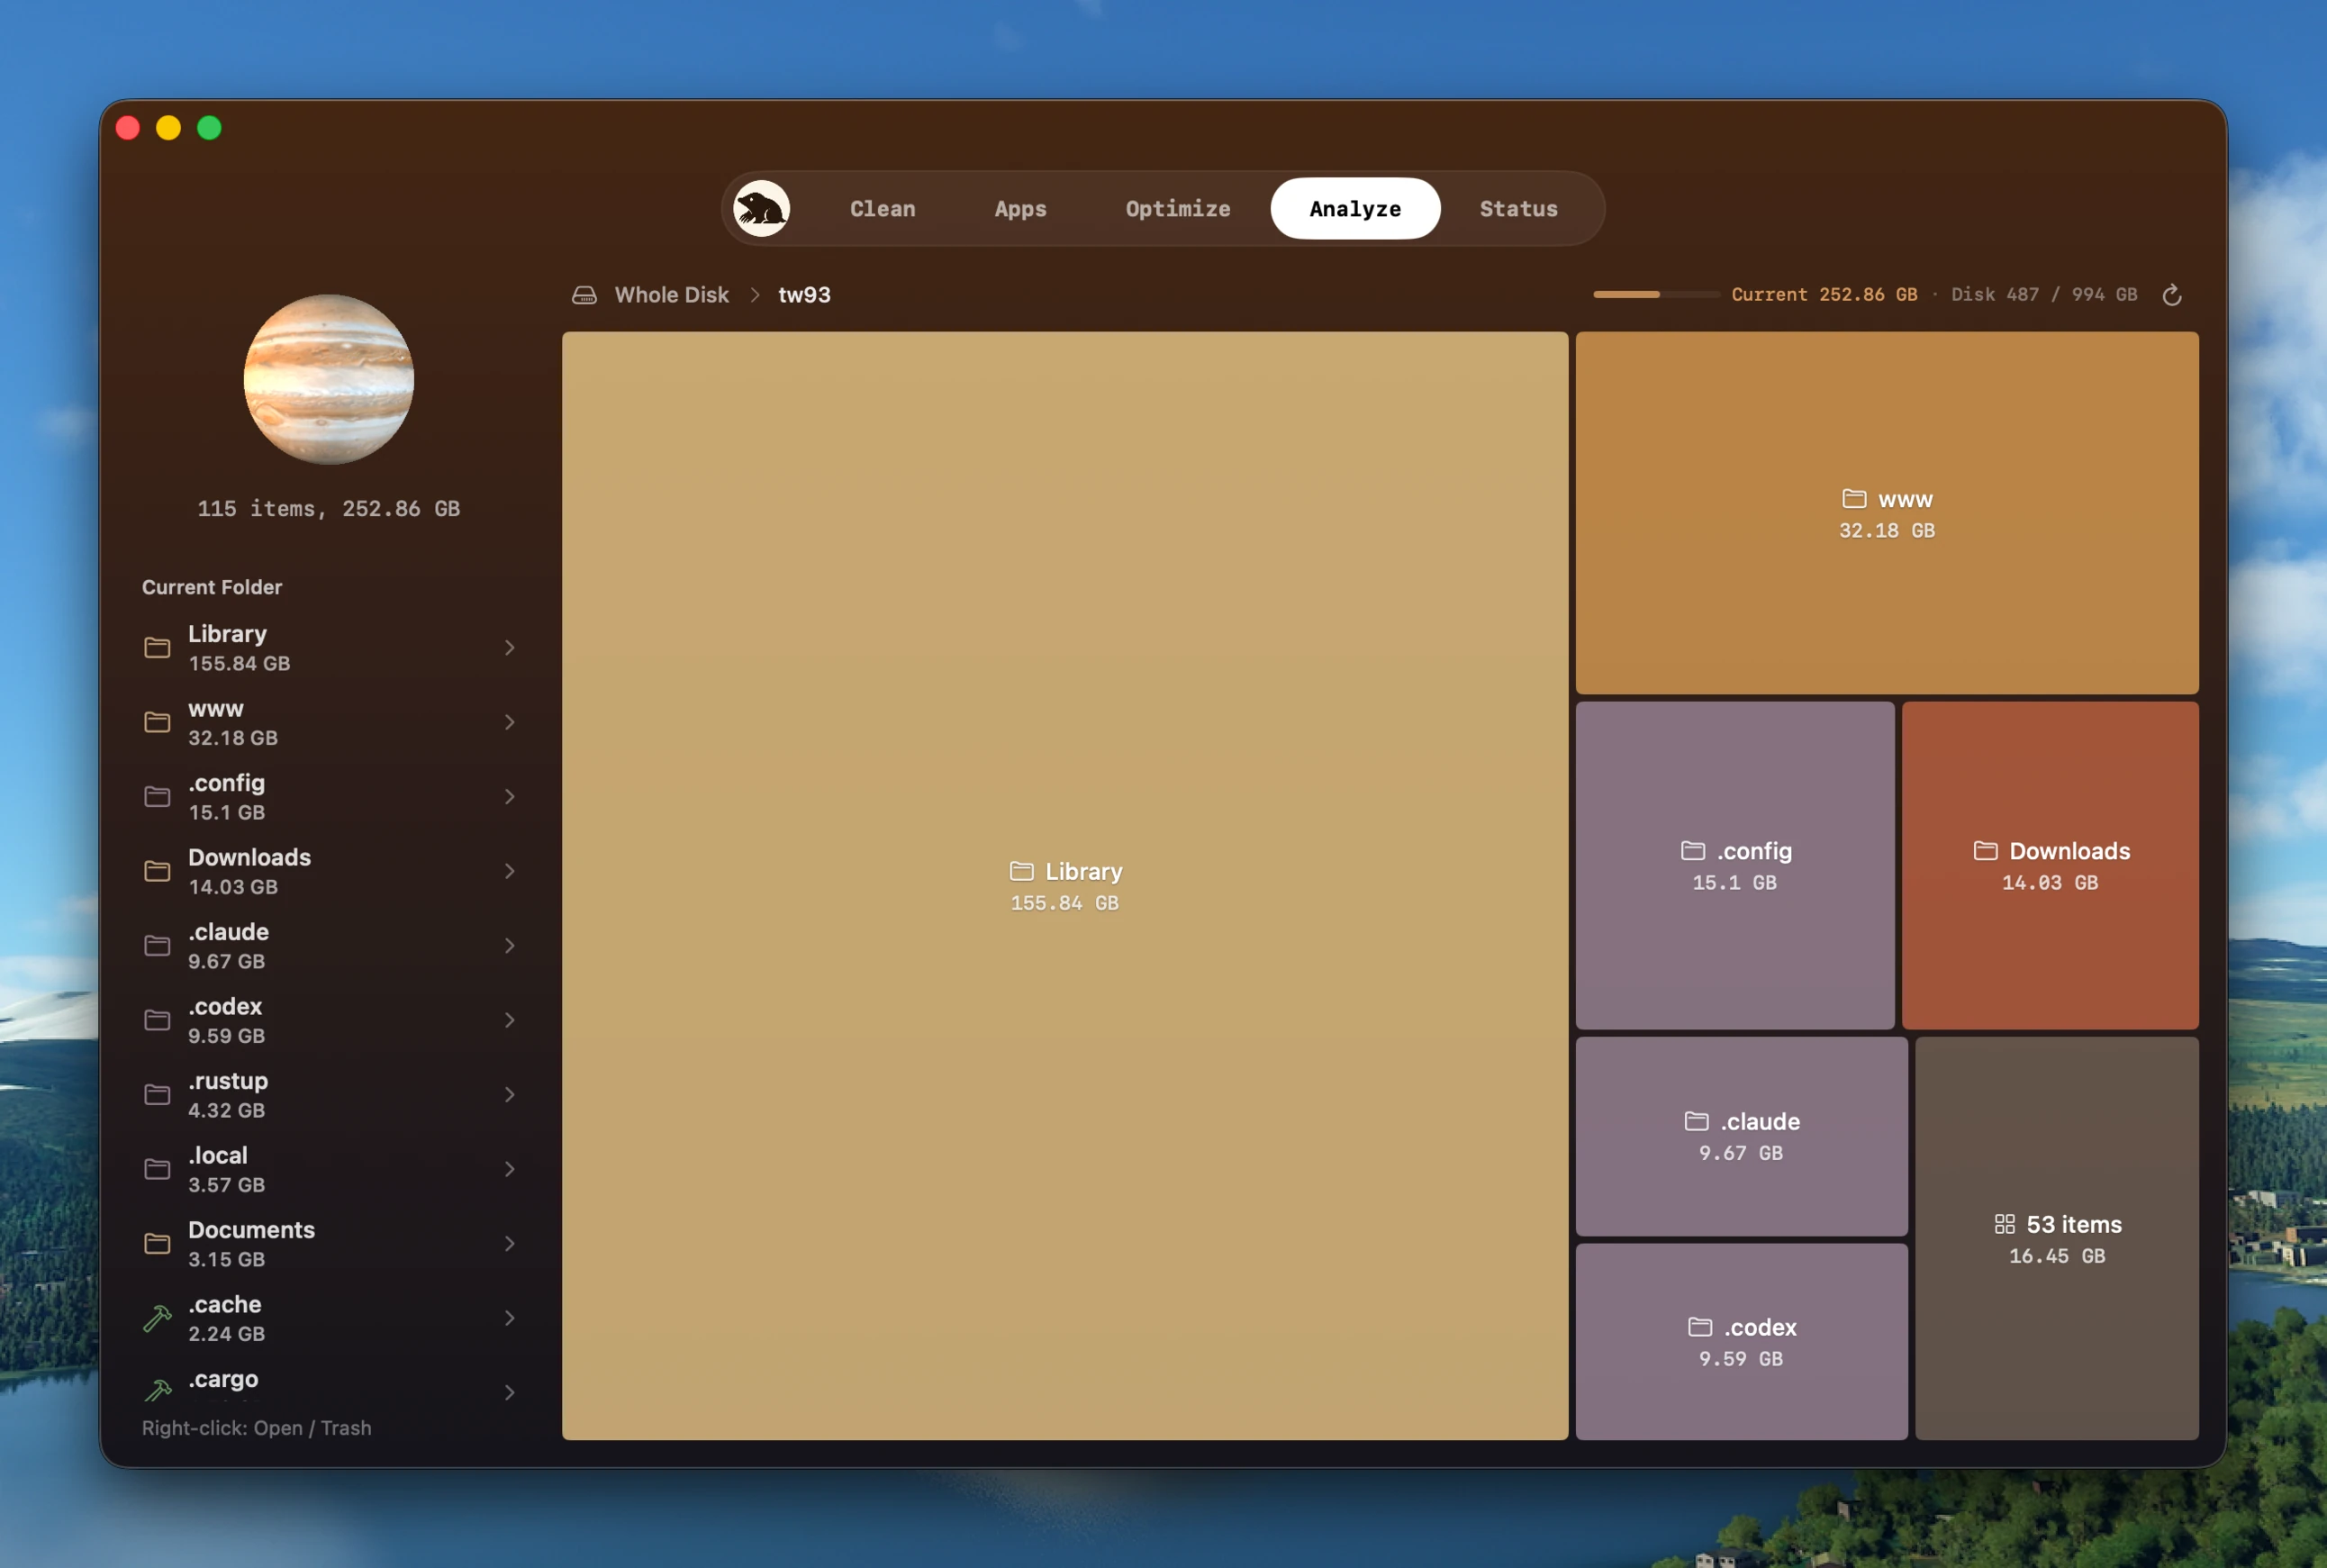
From Terminal, measure only the home folders you control:
du -sh ~/* ~/Library 2>/dev/null | sort -h
Take the largest line one level deeper. For example:
du -sh ~/Library/* 2>/dev/null | sort -h
To find single large files, start with ordinary user folders rather than every database on the disk:
find ~/Downloads ~/Movies ~/Desktop -type f -size +500M -print 2>/dev/null
These folders can still contain databases or cloud-synced files, including an iCloud Desktop. The search identifies size, not deletion safety. Scans may skip protected paths and can take time. A treemap shows the same hierarchy visually, and Mole's Analyze view maps the whole disk with drill-down, reveal in Finder, and send to Trash. Either way, turn "the disk is full" into "this folder is large" before deleting. See how to find large files on Mac when the files you can see do not add up to the used capacity.
Step 2: Rank the safe wins
Work down this list. Stop as soon as you have enough headroom.
| Priority | Target | Recovery check |
|---|---|---|
| 1 | Downloads, installers, duplicate exports | You can fetch or generate them again |
| 2 | Trash | Open it and verify every large item before emptying |
| 3 | Unused apps | Keep documents, cancel subscriptions separately, use the vendor uninstaller when provided |
| 4 | Old device backups | Confirm the device and date in Finder's Manage Backups view |
| 5 | App-managed caches and offline downloads | Quit the app and accept the rebuild or download cost |
| 6 | Managed media and developer storage | Use the owning app or tool, then test the library or project |
Downloads and duplicate output
Old installers, disk images, exported videos, and copied archives often produce the best ratio of reclaimed space to recovery risk. Confirm another copy exists, move the item to Trash, and leave it there while you test.
Apps you no longer use
Apple recommends using an app's own uninstaller when it provides one, because it may also remove login items or extensions. Otherwise move the app to Trash. Uninstalling an app does not remove documents you created with it and does not cancel a subscription. Use the complete Mac uninstall guide when you need to identify leftovers without deleting another app's shared data.
Old iPhone and iPad backups
Open Finder, connect or select the device, choose General > Manage Backups, and review the device and date. Apple's backup-management guide supports Delete, Archive, and Show in Finder from this view. Do not delete an opaque backup folder simply because it is large.
Caches and browser storage
Prefer an app's own storage control. Quit the app before clearing a documented cache, and expect the first launch to be slower or offline content to download again. Read what cache cleanup changes or the browser storage guide before touching hidden folders.
Photos, videos, and other managed libraries
Use Photos, Music, Mail, or the owning media app to remove or relocate content. Apple's Photos library guide allows a library to move to a properly formatted external drive, but the drive must be available before Photos opens. Verify the moved library, designate it as the System Photo Library when required, and only then consider the original. See the Photos storage guide for the full workflow.
Developer tools, containers, and virtual machines
Build output and downloaded runtimes can be large, but projects, credentials, databases, and toolchains often sit nearby. Use the owner's cleanup or prune command with a preview when available. Start with the developer-cache guide, Xcode guide, or Docker guide instead of deleting a whole hidden directory.
Step 3: Keep these out of the cleanup
Do not manually remove:
- Anything inside
/System - Active Mail, Messages, Photos, browser, sync, VM, or container databases
- APFS snapshot internals, swap files, and other system-managed storage
- Cloud placeholders when you have not confirmed where the full original lives
- Any Library folder whose owner and recovery path you cannot name
File size proves that an item matters to capacity. It does not prove that the item is disposable.
Why the free-space number can lag
Moving a file to Trash does not make its capacity available until Trash is emptied. Apple warns that items become permanently unavailable after that step, which is why verification comes first. macOS can also keep deleted blocks in a local Time Machine snapshot until it ages out, and count purgeable data as available before physically removing it.
List snapshots without changing them:
tmutil listlocalsnapshots /
diskutil apfs listSnapshots /
Apple says Time Machine normally removes local snapshots automatically as they age or when capacity is needed. Storage categories can also take time to reindex. Check physical available capacity and the folder you targeted instead of deleting more data because one colored bar has not redrawn.
Step 4: Verify before emptying Trash
While the removed items are still recoverable:
- Open the apps whose cache or support data changed.
- Open recent documents, Photos libraries, and media projects.
- Start important virtual machines and containers.
- Confirm cloud files can download and that local-only originals still exist.
- Check System Settings > General > Storage and run
df -h /again.
If something is missing, use Put Back from Trash or restore it from the backup. Empty Trash only after the affected work opens normally and you have checked the items you are about to erase. Then measure available capacity again.
A practical stopping rule
Stop when the Mac can save normal work, install updates, and create temporary files without storage warnings. There is no universal percentage or cache size that every Mac must reach. Keep a comfortable margin for the work you actually do, not an arbitrary score.
Protect unique data, remove the largest confirmed replaceable items, use owning apps for managed libraries, and leave ambiguous or system-managed data alone. A smaller cleanup that you can verify is better than a dramatic number you cannot recover from.